14 DAY TRIAL //
 Writing became one of the first activities to benefit from what a computer has to offer. Throughout the years, different editors appeared on the market and got refined in time. There’s a popular suite you surely at least heard of.
We’re talking of course about Microsoft’s Office Suite. It packs, just as the name suggests, several powerful tools to help you out in different office activities. Surprisingly enough, the counterpart originally created for simple presentations can be used for a lot of other stuff.
PowerPoint is equipped with a set of cleverly implemented features that greatly enhances and encourages creativity. Entire animations can be created without the need for third-party components or resources. What’s more, the result can even be saved under video file formats.
Here’s a general overview of how you can create short animations with using nothing more than just PowerPoint.
Adding and editing objects
Step 1: Download and install Microsoft Office.
Step 2: Run the PowerPoint component.
Step 3: Move to the Insert tab from the Ribbon menu.
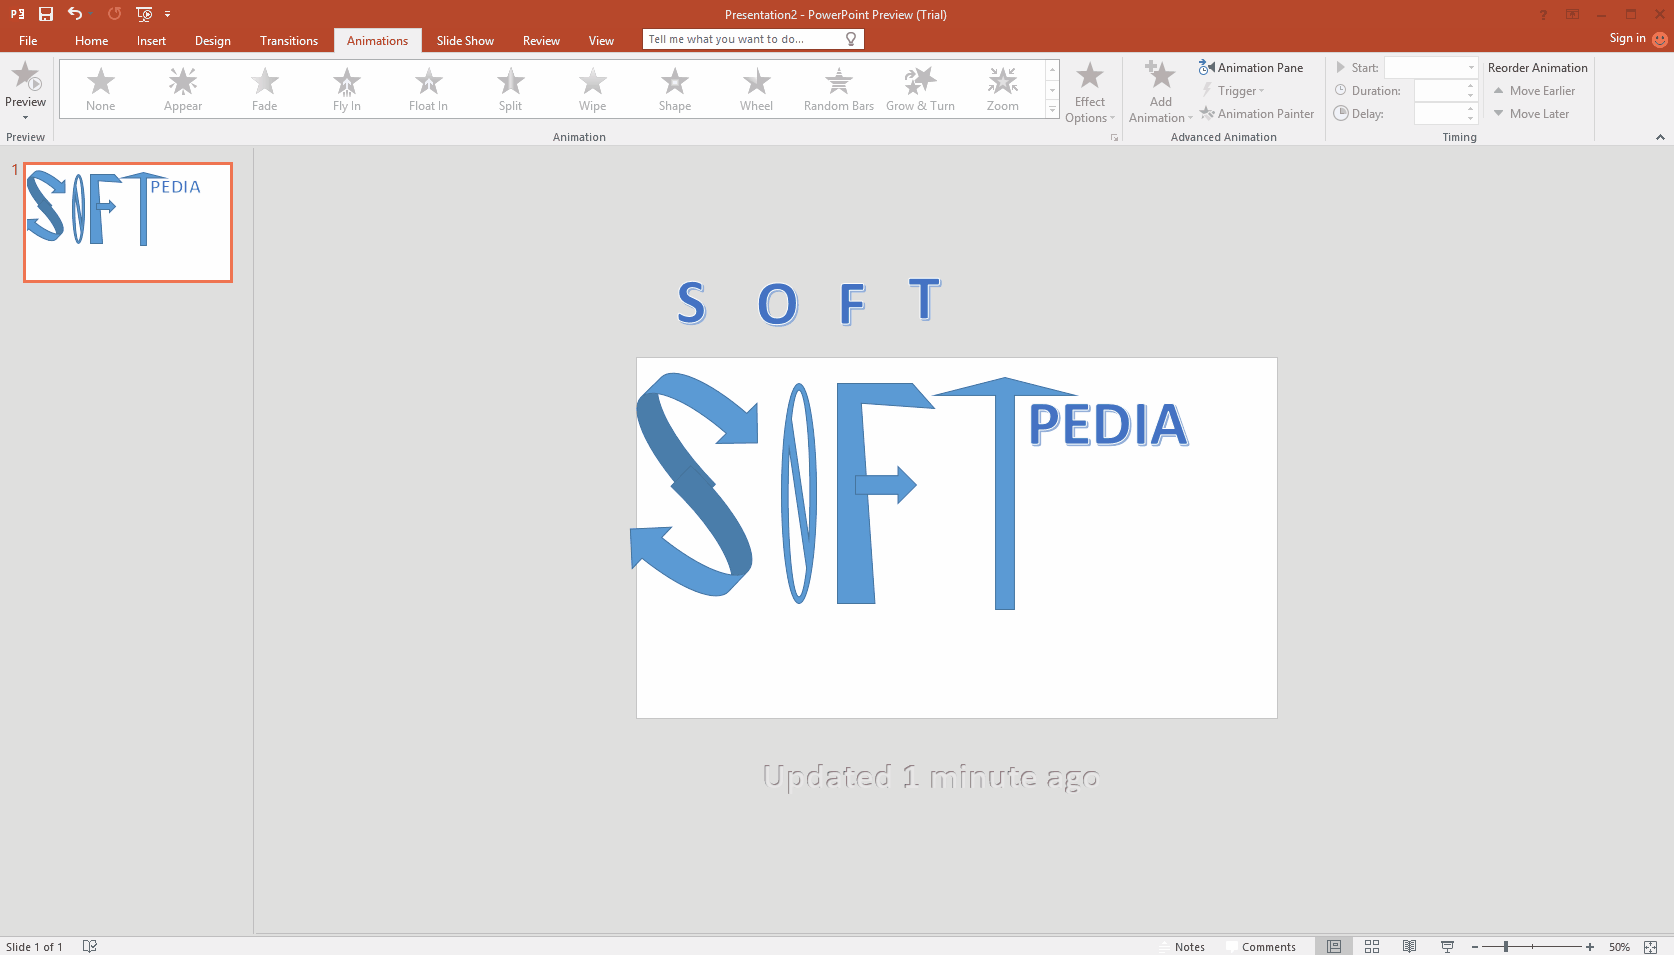
Step 4: Click on Shapes and choose the one you like. Do this for all shapes you want to add. Removing is done by selecting it and pressing Delete.
Step 5: Select an object and use border points to move, resize, rotate, and modify shape or style.
Note: Thorough shape customization is made available by right-clicking an object, and selecting Edit Points.
Step 6: Move all objects to the initial position, not how they end up in the last frame.
Configuring time settings
Step 1: Switch to the Animations tab from the Ribbon menu.
Step 2: Click on Add Animations and choose the one of interest. It’s recommended to select categories from the bottom of the list, where More can be found.
Step 3: Do the same for all other objects you want to animate.
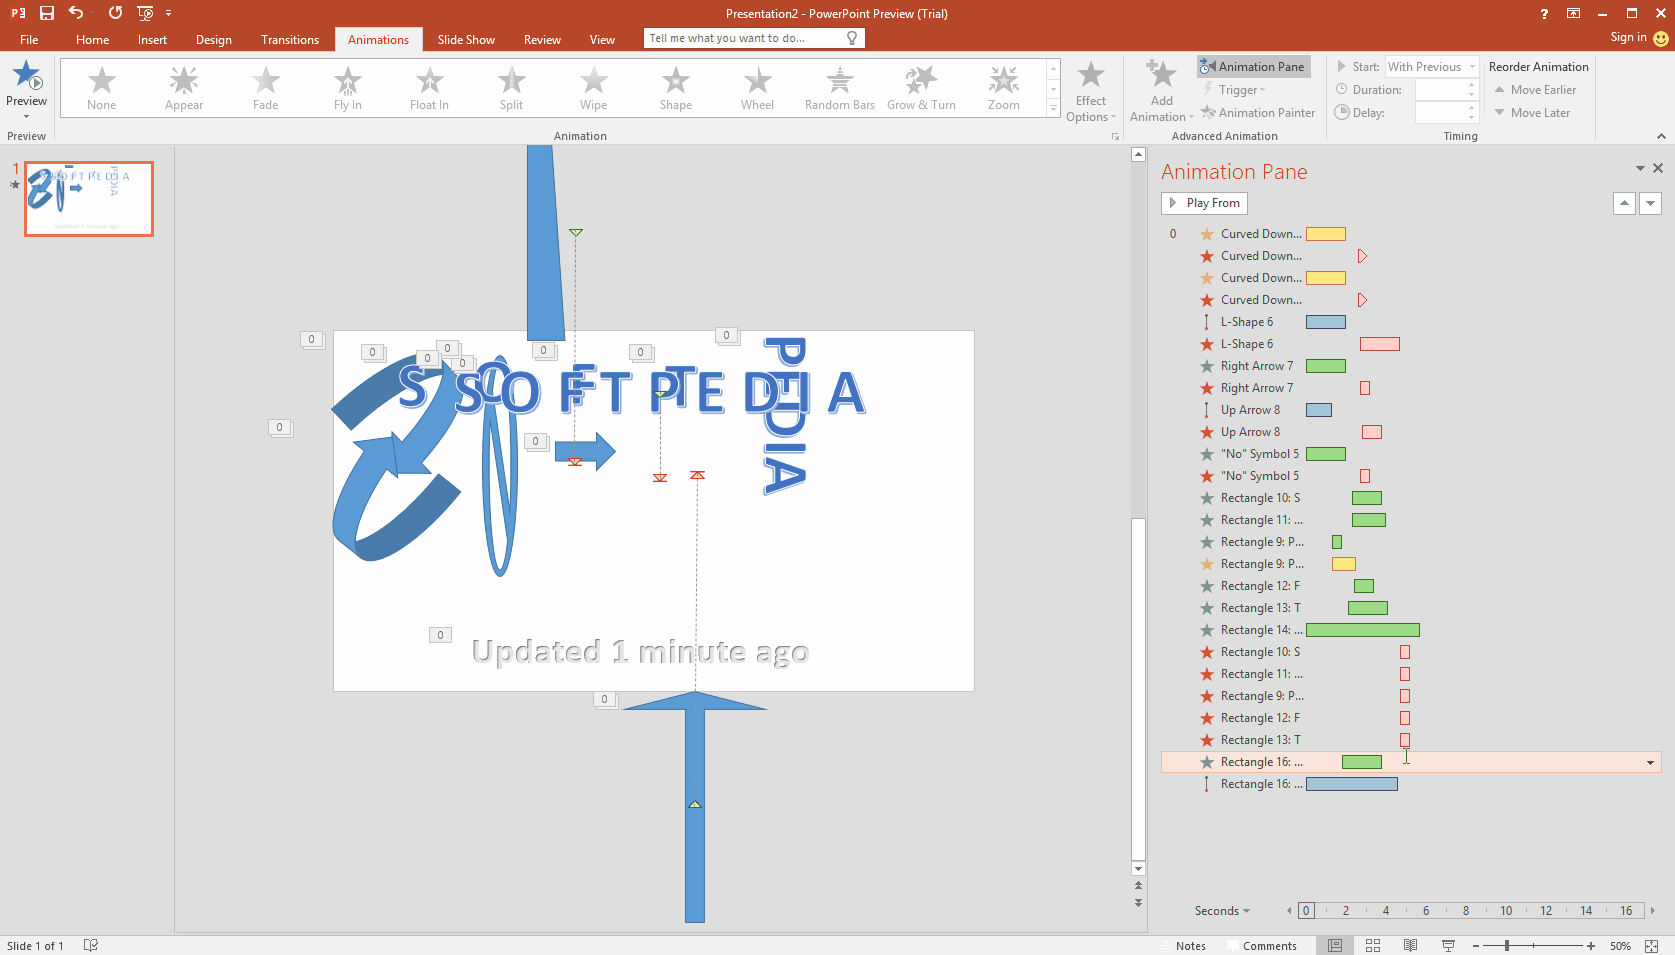
Step 4: Click the Animation Pane to polish transitions.
Note: Objects are identified by selecting the animation from the pane, or by the name in the panel, but working with objects is a little difficult for name identification.
Step 5: Double-click an animation to configure technical settings. Path movement, animation duration, timing, and repeat are done here.
Note: Motion animations have static preview and paths displayed, with the possibility to edit them using the mouse to set a new position. A longer path doesn’t result in a longer animation, so time needs to be fixed as well.
Step 6: Right-click animations and make them Start with previous, otherwise it waits for mouse click.
Step 7: Drag the rectangles found next to the animation name it order to adjust timing.
Step 8: Click on an empty space, then hit Play all for a preview.
Generating a movie
Step 1: Go to the File menu.
Step 2: Select Export and choose to Create a Video.
Step 3: Pick one of the three available quality formats.
Step 4: Press the Create Video button and choose a destination. Available formats let you save either as MP4 or WMV.