 14 DAY TRIAL //
 FreeNX is the free version of NoMachine's NX Server, which makes fast, secure, remote X11 connections to enable users to access remote Linux and Unix desktop sessions over a data link such as LAN or Internet.
The server has been developed in such way that it's fast enough even over a low bandwidth and high latency connection such as a dial-up link. This is one of the main reasons I will choose FreeNX over a common VNC program.
FreeNX can be also set up as a proxy, so it will tunnel Remote Desktop Protocols and remote Virtual Network Computing sessions, giving them some of the same speed improvements. FreeNX uses high optimized techniques to compress the X11 data, minimizing the amount of data that needs to be transferred, providing a responsive and real-time remote desktop experience.
Installing FreeNX using YaST
- Open the main KDE menu, go to System and click on YaST Control Center - Enter the root password, then click on Software Management - Make sure the Filter spinner is set to Search and in the search box, type freenx - In the results pane, check in the box next to FreeNX entry and press Accept. If you don't get any results, read at the end of this guide. - Click Continue in the pop-up window and finish the installation. You now have FreeNX installed.
Setting up the OpenSuSE firewall to accept connections
- From the same YaST Control Center, go to Security and Users and click on Firewall - Click on Allowed Services in the left pane. - Select External Zone for the Allowed Services for Selected Zone and SSH from the drop-down menu under Service to Allow. Click Add. - Click Next and then Accept.
FreeNX Server Configuration
- Open a super user terminal terminal (KDE main menu / System / Terminal / Super User Mode). Enter the root password when prompted. - In the super user terminal, run the following command:
Your FreeNX server is now ready to accept connections.
Installing the NX Client on another Linux system
The NoMachine Linux NX client software is available in three flavors: as RPM, DEB and TAR. If the other Linux system is a RedHat/Fedora, openSUSE/SuSE or Mandriva, use the RPM package. For Debian systems, including Ubuntu, MEPIS, Linspire or Xandros, use the DEB package. For everything else, use the TAR archive.
- Go to NoMachine Linux Client Download Page and download the suitable package for your system. Install it using one of the guides:
For RPM: - Open a root (super-user) terminal and type:
# rpm -ihv nxclient-VERSION.rpm
# dpkg -i nxclient-VERSION.deb
(if that command fails, try:)
$ /usr/NX/bin/nxclient
# cd /usr
# tar xfz nxclient-VERSION.tar.gz
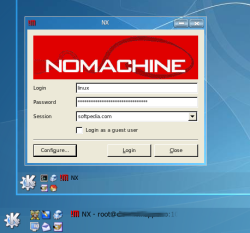
Connecting to the SuSE Desktop using FreeNX
If it's the first time you run the NX Client on another Linux system, it's better to run the nxclient command with the -wizard option. So instead of:
OR
$ /usr/NX/bin/nxclient
OR
$ /usr/NX/bin/nxclient -wizard
In a few moments, you should be able to see and manage the SuSE Desktop.