
 14 DAY TRIAL //
 The following tutorial will teach any computer user how to install the Arch Linux operating system on their personal computer or laptop.
Arch Linux, the ultimate frontier! Well, the funny thing is that Arch Linux has become some sort of a scarecrow for many Linux beginners, especially for those who were “trained” into Ubuntu or other “Linux distribution for the average Joe or Jane.” And that’s because of the kind of painful installation process, which we’ll try to simplify in this tutorial.
However, the truth is that once you install Arch Linux, you’ll get a lightweight and flexible (do-it-yourself) Linux distribution, designed as a Rolling Release, which means that you won’t have to upgrade every 6 months to a different release like some popular Linux OSes do these days. You install once and you update you system on a regular basis.
Arch Linux follows the KISS principle: Keep it simple, stupid! It will keep your system up-to-date and on the bleeding edge, so you won’t have to wait six months for a new kernel.
What do I need to get started? The wonderful people behind the Arch Linux operating system provide a monthly updated ISO image, just in case any new Linux user wants to try the distribution. Get the latest version right now from Softpedia.
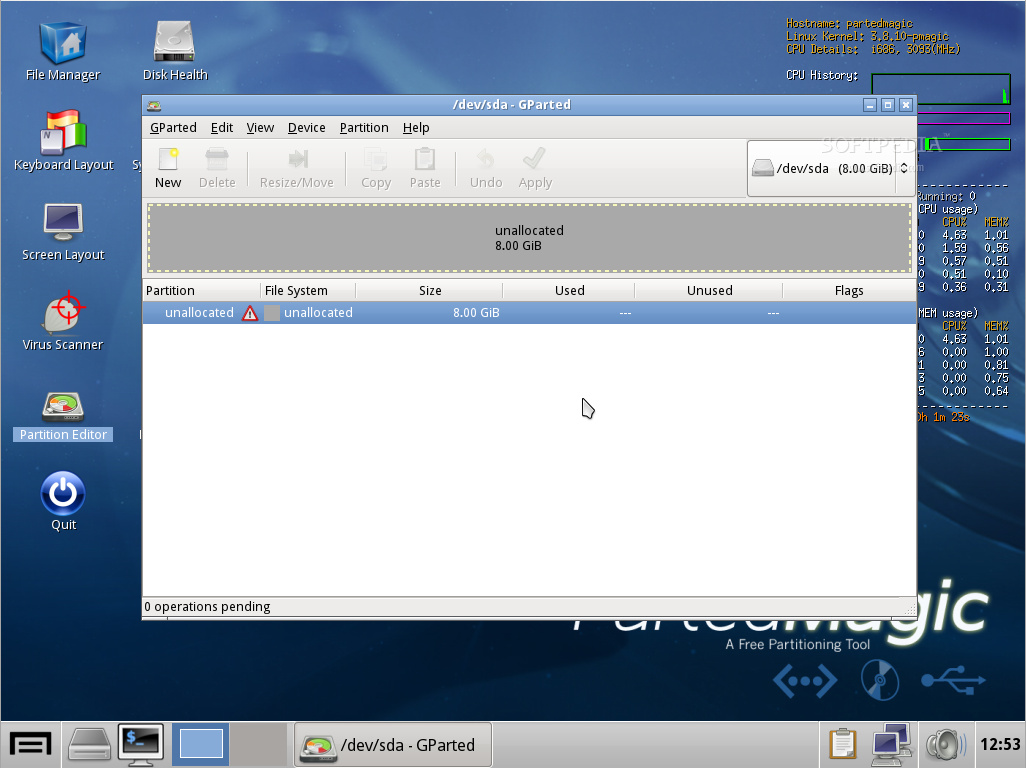
But, before anything else, you need to partition your hard drive for Arch Linux, so you won’t have to do it manually from within the Live CD. For this, we will use the Parted Magic Live CD.
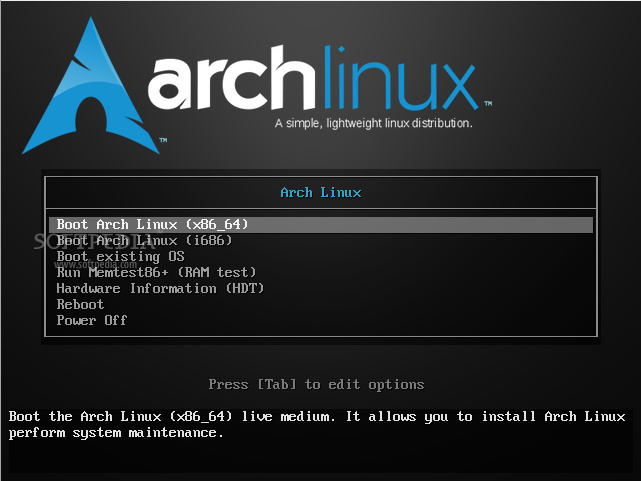
At this moment, you should write both ISO images on two different USB flash drives by following our very popular and useful “How to Run Linux from an USB Flash Drive” tutorial. In case you don’t have two USB sticks, write the Parted Magic ISO first and overwrite it with the Arch Linux ISO image when you’re done partitioning the hard drive.
So, insert the Parted Magic USB stick in a USB port, and reboot the computer in order to boot from the flash drive. Hit the F8, F11 or F12 key (depending on your BIOS) until the boot menu appears, in order to select the USB flash drive as the boot device.
Partition your hard drive:
Once the Parted Magic CD was loaded into memory, start the Partition Editor tool from the desktop...
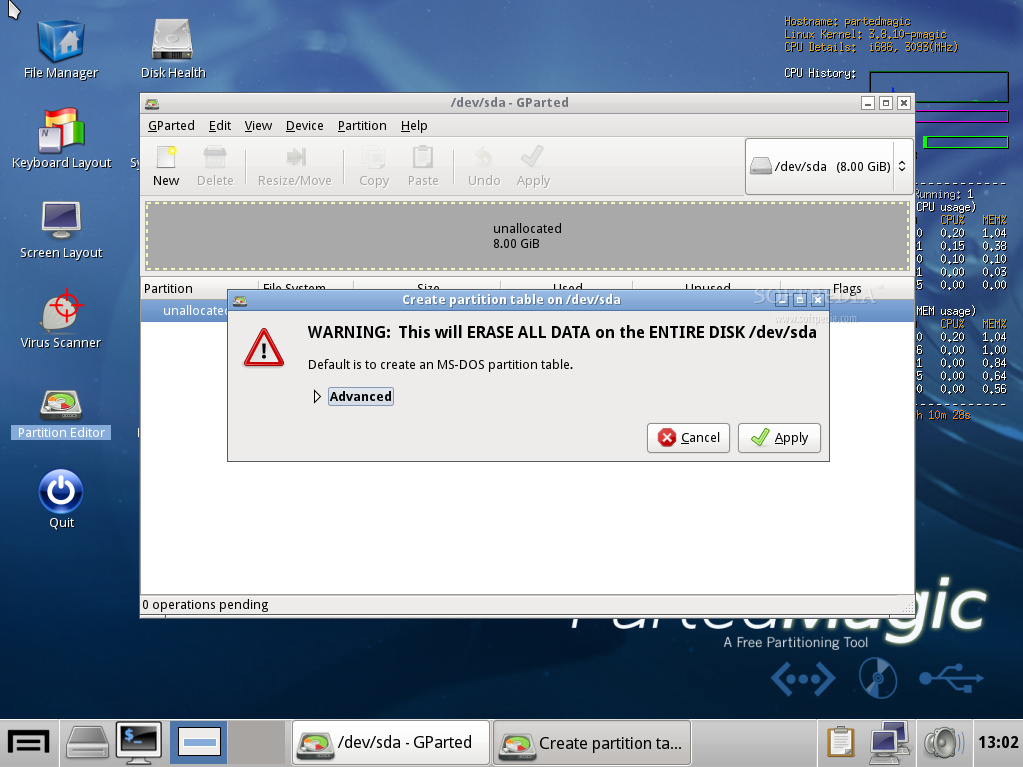
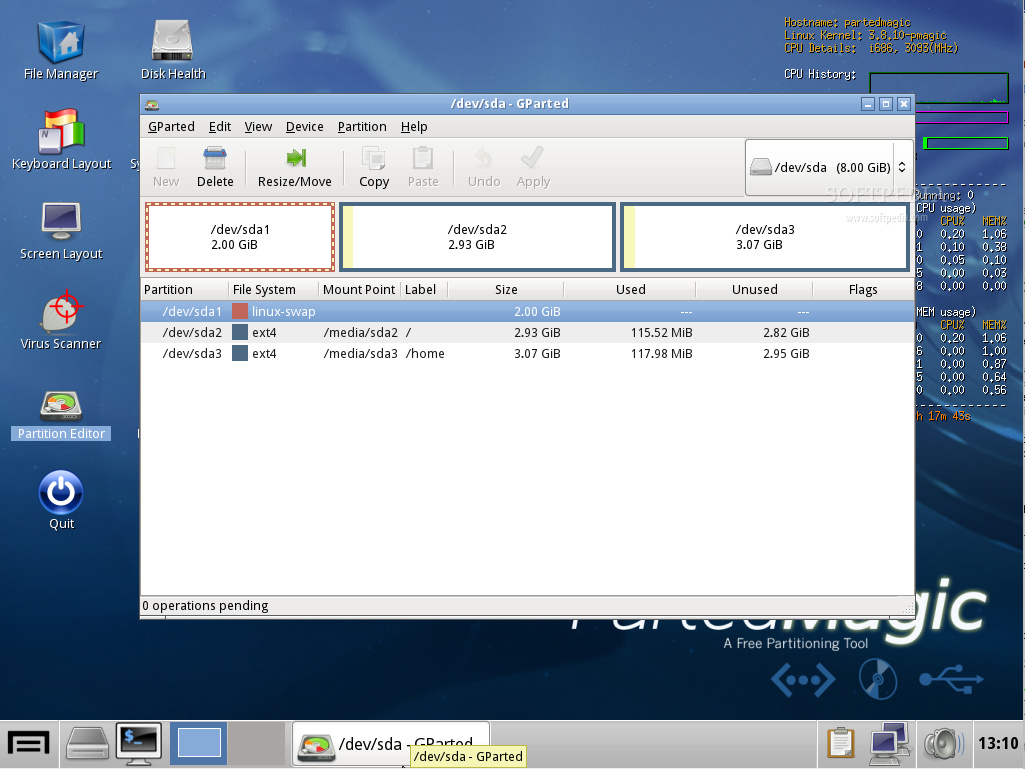
Now, right click on the unallocated entry and choose "New" to create the partitions. In the new window, type 2048 in the "New size (MiB)" field and select the "swap area" option from the "Filesystem" drop down list. Click the OK button and, in a few seconds, you'll notice a "swap" line with the specified size.
Once again, right click on the unallocated entry, type the size of your home partition in the "New size (MiB)" field (usually the rest of the hard drive) and select the "ext4" option from the "Filesystem" drop down list. Type /home in the Label field. Click the OK button and, in a few seconds, you'll notice a "/home" line with the specified size.
Click the "Apply" button to make the changes. Click Apply again on the warning dialog and wait for the partitioning process to finish. Close the dialog.
Wait for the image to load...
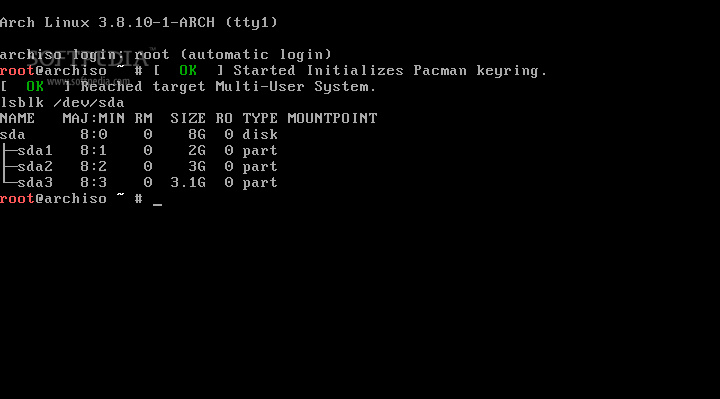
lsblk /dev/sda
...and the output is:
swapon /dev/sda2
Let’s mount the partitions: mount /dev/sda1 /mnt mkdir /mnt/home mount /dev/sda3 /mnt/home
Run the following command to install the base system for your future Arch Linux installation:
pacstrap /mnt base base-devel
Hit Enter and wait for the download/installation process to finish, as it will take a few minutes, depending on your Internet speed. What will happen now? Some packages will be downloaded and installed. You can see the progress in real time. When everything is done, run the following command to configure system configuration file, named fstab, which lists all your partitions:
genfstab -U -p /mnt >> /mnt/etc/fstab
And now, it’s time to configure your Arch Linux system. Let’s get in, shall we? Use the following command:
arch-chroot /mnt
So, we’re in, let’s set up the local language with the following command:
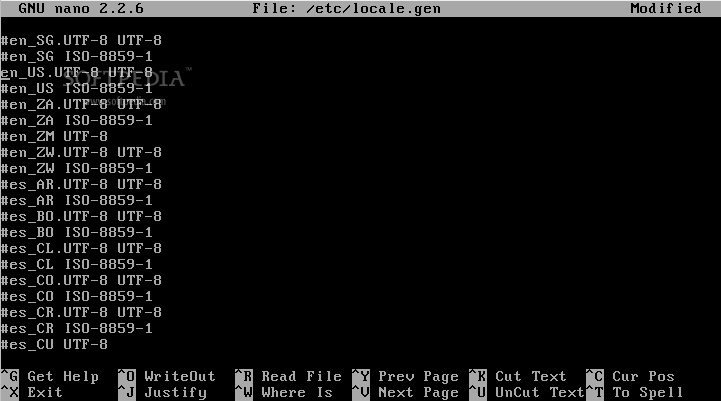
nano /etc/locale.gen
Scroll the file until you find your language and uncomment the # in front of it. For us it was en_US.UTF-8 UTF-8, which means English United States, Unicode encoding. Save the file using the CTRL+O keyboard shortcut. Exit it using the CTRL+X keyboard shortcut.
locale-gen echo LANG=en_US.UTF-8 > /etc/locale.conf export LANG=en_US.UTF-8
WARNING: Replace en_US.UTF-8 from the above commands with your selected locale!
Now we need to specify the timezone, so run the following command:
ln -s /usr/share/zoneinfo/Zone/SubZone /etc/localtime
Note: Replace Zone and SubZone with your country and city. Example: ln -s /usr/share/zoneinfo/Romania/Bucharest /etc/localtime.
Now let’s set the clock depending on the country and city selected above:
hwclock --systohc --utc

nano /etc/pacman.conf
...and delete the # in front of the following lines:
[multilib] Include = /etc/pacman.d/mirrorlist
You know the drill, save the file using the CTRL+O keyboard shortcut. Exit it using the CTRL+X keyboard shortcut.
Let’s update the software repositories:
pacman -Sy
Editor’s note: Please meet pacman, your best friend from now on. pacman will help you install or remove packages from your system, as well as keep your entire machine up to date.
Let’s create a password for the Administrator (also known as root):
passwd
Type the password and hit Enter, twice.
Let’s add a user now:
useradd -m -g users -G wheel,storage,power -s /bin/bash softpedia
...and set a password for it:
passwd softpedia
Type the password and hit Enter, twice.
Let’s install the gate keeper... just kidding, only sudo, with the following command:
pacman -S sudo
And now, let’s give some rights to your newly created user. Execute the following command:
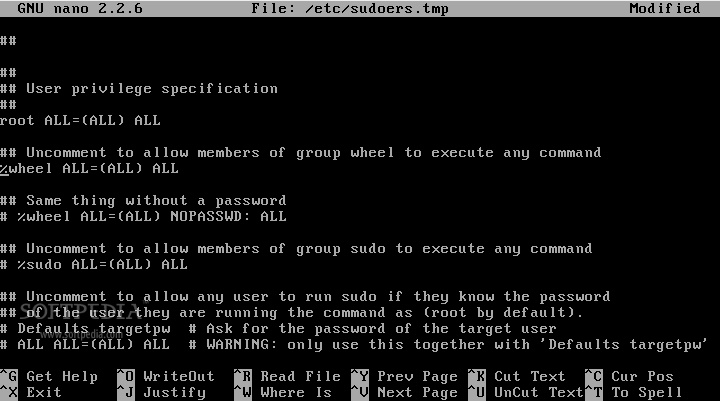
EDITOR=nano visudo
Scroll down until you find the %wheel ALL=(ALL) ALL line. Delete the # in front of it. Save the file using the CTRL+O keyboard shortcut. Exit it using the CTRL+X keyboard shortcut.
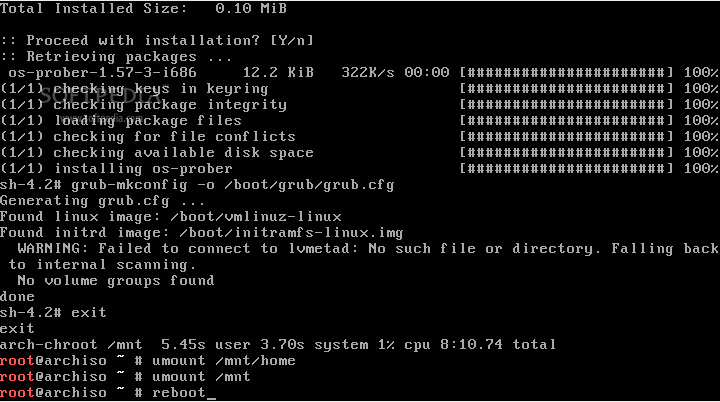
pacman -S bash-completion grub-bios os-prober
...and setup the boot loader... grub-install --target=i386-pc --recheck /dev/sda cp /usr/share/locale/en\@quot/LC_MESSAGES/grub.mo /boot/grub/locale/en.mo grub-mkconfig -o /boot/grub/grub.cfg Note: Remember to use /dev/sda or /dev/sdb in the above command, depending on your hard drive!
That’s it, let’s exit the system and eject the mounted partitions:
exit umount /mnt/home umount /mnt reboot
ip link
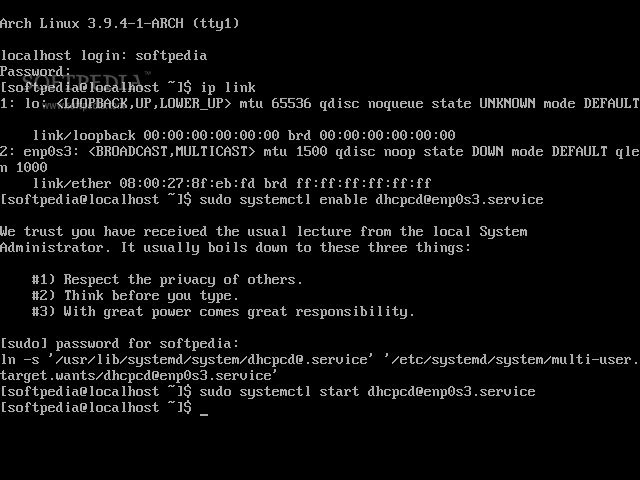
sudo systemctl enable dhcpcd@<interface>.service sudo systemctl start dhcpcd@<interface>.service
Note: Replace <interface> in the above commands with the name of your interface. For example: sudo systemctl enable [email protected] / sudo systemctl start [email protected]
Let’s install the X11 packages and the video drivers:
sudo pacman -S xorg-server xorg-xinit xorg-server-utils mesa xf86-input-synaptics
Nvidia users should use the following command:
sudo pacman -S nvidia (for 32-bit users) sudo pacman -S nvidia lib32-nvidia-utils (for 64-bit users)
ATI users should use the following command:
sudo pacman -S catalyst-dkms (for 32-bit users) sudo pacman -S catalyst-dkms lib32-catalyst-utils (for 64-bit users)
Intel users should use the following command:
sudo pacman -S xf86-video-intel
And now, it’s time to install a desktop environment. Use the following command for GNOME:
sudo pacman -S gnome
...or the following command for KDE:
sudo pacman -S kde
This will download a lot of packages and it will take some time. When everything is done, run the following commands to start the desktop environment:
FOR GNOME USERS:
sudo systemctl enable gdm.service sudo systemctl start gdm.service
FOR KDE USERS:
sudo systemctl enable kdm.service sudo systemctl start kdm.service

Also, don't hesitate to read our "How to Install Third-Party Apps in Arch Linux" tutorial.